I have had my eye on this cookbook for a while now but kept telling myself that I didn't really NEED it. So once the Daring Bakers chose one of its recipes as this months baking challenge I took it as a sign that I should probably have it after all. The recipes are truly inspiring. Theres the Chocolate Marscapone Cheesecake Pots with Shortbread Spoons. You actually make little spoons out of shortbread cookies to eat the Cheesecake Pots with. Purely genius! Or the Rich Risotto Rice Pudding, it looks divine, served with caramel sauce. And then ofcourse there is the Cheesecake Pops, which brings me to this months Daring Bakers Challenge.

Little balls of decadent cheesecake sitting on a stick and dipped in luscious chocolate. What could be more fun than this? The creativity came in the decorating. I knew they could be really cute decorated with sprinkles and bits of candy and perhaps some colorful bows. And instead of the (recommended) round balls of cheesecake I chose to cook mine in a mini muffin silicone pan. This would give me a wonderful flat surface to use something else I had had my eye on for a while: Chocolate transfer sheets. They work like magic. You can use them on anything chocolate to create a whimsical edible design.
I used a 2 oz. cookie scoop to fill the mini muffin pan with. I then baked as directed for 20 minutes and let them firm up for a bit in the fridge. I was then able to pop the mini cheesecakes out by pushing up from the bottom of the silicone cups. I then put them on a cookie sheet and inserted lollipop sticks through the center. I then froze as directed and it worked like a dream.
I was then able to dip each pop in bittersweet chocolate, and before it dried I either rolled them in bits of toffee, or pressed them in real chocolate sprinkles. And some I used the chocolate transfer sheets on. I found a variety of sources that sold them over the Internet.
Here is where I found the designs I used on the pops. The designs come in sheets that you can cut to the size you need. I cut mine into 2 inch squares and pressed them into the chocolate before it dries. Because the cheesecake is frozen you need to work really fast because the chocolate sets very quickly. You then wait a few minutes for the chocolate to set completely and you peel the sheet off and it leaves a wonderful little design.

Here is the recipe as given to us from the Daring Bakers Elle and Deborah. My alterations are stated above.
Cheesecake Pops
From Sticky, Chewy, Messy Gooey. By Jill O'Connor
Makes 30 – 40 Pops
5 8-oz. packages cream cheese at room temperature
2 cups sugar
¼ cup all-purpose flour
¼ teaspoon salt
5 large eggs
2 egg yolks
2 teaspoons pure vanilla extract
¼ cup heavy cream
Boiling water as needed
Thirty to forty 8-inch lollipop sticks
1 pound chocolate, finely chopped – you can use all one kind or half and half of dark, milk, or white (Alternately, you can use 1 pound of flavored coatings, also known as summer coating, confectionery coating or wafer chocolate – candy supply stores carry colors, as well as the three kinds of chocolate.)
2 tablespoons vegetable shortening
(Note: White chocolate is harder to use this way, but not impossible)
Assorted decorations such as chopped nuts, colored jimmies, crushed peppermints, mini chocolate chips, sanding sugars, dragees) - Optional
Position oven rack in the middle of the oven and preheat to 325 degrees F. Set some water to boil. In a large bowl, beat together the cream cheese, sugar, flour, and salt until smooth. If using a mixer, mix on low speed. Add the whole eggs and the egg yolks, one at a time, beating well (but still at low speed) after each addition. Beat in the vanilla and cream. Grease a 10-inch cake pan (not a spring form pan), and pour the batter into the cake pan. Place the pan in a larger roasting pan. Fill the roasting pan with the boiling water until it reaches halfway up the sides of the cake pan. Bake until the cheesecake is firm and slightly golden on top, 35 to 45 minutes. Remove the cheesecake from the water bath and cool to room temperature. Cover the cheesecake with plastic wrap and refrigerate until very cold, at least 3 hours or up to overnight. When the cheesecake is cold and very firm, scoop the cheesecake into 2-ounce balls and place on a parchment paper-lined baking sheet. Carefully insert a lollipop stick into each cheesecake ball. Freeze the cheesecake pops, uncovered, until very hard, at least 1 – 2 hours. When the cheesecake pops are frozen and ready for dipping, prepare the chocolate. In the top of a double boiler, set over simmering water, or in a heatproof bowl set over a pot of simmering water, heat half the chocolate and half the shortening, stirring often, until chocolate is melted and chocolate and shortening are combined. Stir until completely smooth. Do not heat the chocolate too much or your chocolate will lose it’s shine after it has dried. Save the rest of the chocolate and shortening for later dipping, or use another type of chocolate for variety. Alternately, you can microwave the same amount of chocolate coating pieces on high at 30 second intervals, stirring until smooth. Quickly dip a frozen cheesecake pop in the melted chocolate, swirling quickly to coat it completely. Shake off any excess into the melted chocolate. If you like, you can now roll the pops quickly in optional decorations. You can also drizzle them with a contrasting color of melted chocolate (dark chocolate drizzled over milk chocolate or white chocolate over dark chocolate, etc.) Place the pop on a clean parchment paper-lined baking sheet to set. Repeat with remaining pops, melting more chocolate and shortening (or confectionery chocolate pieces) as needed. Refrigerate the pops for up to 24 hours, until ready to serve.
You can check out the other Daring Bakers and there Whimsical pops
here.
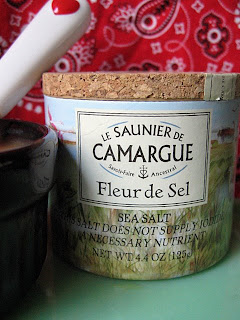
 This is a recipe I have been wanting to try for a while now, ever since I discovered Fleur de Sel. Fleur de Sel, which means flower of salt, is a french sea salt that is harvested by hand off the coast of Brittany. It is a finishing salt that you usually sprinkle on at the end so that it does not melt and lose its delicate flavor. And let me tell you it is divine!


